Foaming Liquid Filling: How to Fill Foamy Products Cleanly

Foaming Liquid Filling:
Foam in filling comes from air or gas entering the product, and the cure is rarely just a slower machine. Work out where the bubbles start, then fill from the bottom of the container with a diving nozzle, or seal the container and recirculate the foam with an overflow filler. Add a clean cut-off so nothing drips. This guide covers each step for detergents, shampoos, hand wash, cosmetics and similar products.
- Foam usually starts upstream, in hoppers, pumps and loose fittings, not at the nozzle. Audit the whole liquid path first.
- Bottom-up (diving) nozzles suit most foaming, free-flowing products. Overflow fillers suit thin to medium products in clear containers. Counter-pressure suits carbonated liquids.
- Drips and strings come from nozzle design, cut-off and product behaviour. Specify them together with the foam solution, not afterwards.
- Test your real product, in your real container, at your real line speed before you buy.
- We build customisable liquid fillers and can match nozzles and layout to your product. Tell us about the liquid first.
Table of Contents
- Why liquids foam during filling
- Fix the liquid path before you touch the filler
- Filling methods that control foam
- Stopping drips and strings
- Matching the method to your product
- Our perspective: test the product, then choose the machine
- A practical way to trial and commission a foaming product
- Choosing a KBW liquid filler
- FAQ
- Sources
Why liquids foam during filling
Foam appears when gas is introduced or released and the liquid can keep the resulting bubbles stable. According to IDA’s guide to solving foaming issues, gas can enter through vortexing and splashing, among other routes. Surfactant-rich products such as washing-up liquid, shampoo, bubble bath and some cosmetic washes are the classic problem cases because their bubbles do not collapse quickly.
Three things make it worse on the line:
- Free fall. A stream dropping from the top of a bottle into the liquid already in it traps air.
- Speed. A high flow rate through a narrow nozzle creates turbulence and splashing.
- Temperature and agitation. Warm, freshly mixed product often carries dissolved or entrained air from the blending stage.
Foam also changes what you are measuring. A volumetric filler can deliver exactly the right dose, but if foam fills the neck, the bottle looks short or overflows. A level-based filler can be fooled in the other direction, leaving a bottle that looks full but holds less liquid than the label says.
Fix the liquid path before you touch the filler
It is tempting to turn the filler down. IDA’s advice is to find the point where gas enters the liquid and to avoid starting by slowing the filler. Slowing down can hide the symptom while cutting output.
Walk the product from the source vessel to the filler inlet and look for the first place bubbles appear. Typical culprits:
- Vortexing in the supply tank or hopper. If liquid spirals down towards the outlet, it pulls air with it. Keep the level above the outlet and avoid draining the vessel too far.
- Return lines that splash. A return pipe discharging above the liquid surface creates foam in the tank. Route it below the surface.
- Leaking suction fittings. A loose clamp or worn seal on the suction side draws in air with every stroke.
- High-velocity transfer. Long runs of narrow hose or an oversized pump increase shear and bubbles.
- Mixing. Give freshly blended batches time to settle where the process allows.
Only when the product arrives at the filler bubble-free does it make sense to judge the nozzle. If you skip this audit, even an excellent filler will be working against a problem it cannot fix.
Filling methods that control foam
There is no single best method. Each controls foam in a different way and each has a trade-off.
Bottom-up filling with diving nozzles
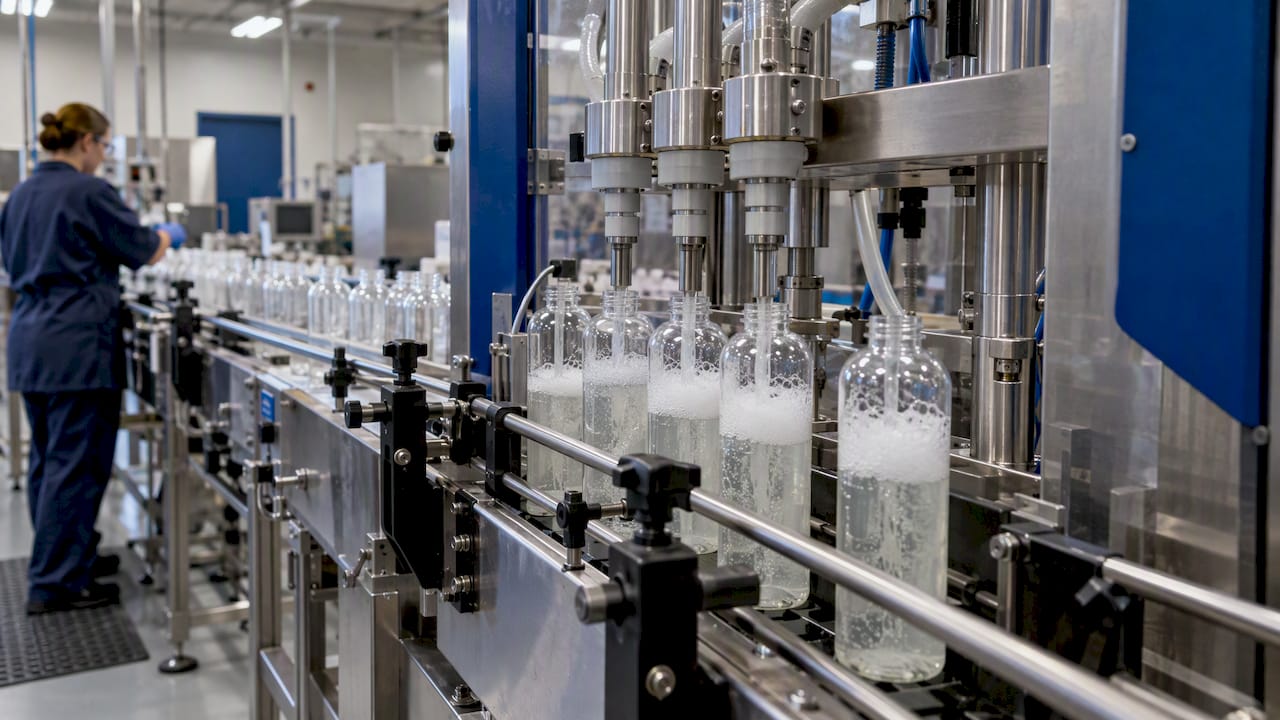
A diving nozzle, also called a bottom-up nozzle, descends into the container before filling starts and rises as the level climbs, which prevents foam formation, as MOM Packaging’s technical glossary explains. The liquid enters beneath the surface instead of falling through air.
The same source lists the drawbacks honestly. Lowering and raising the nozzle costs time, so throughput falls. Each format change needs the top position, bottom position, travel speed and flow rate adjusting. And because the nozzle goes inside the container, a contaminated container can pass contamination to later units. For a pharmaceutical or cosmetic line, that last point matters when you set up your container handling and inspection.
In practice this is the first option to consider for detergents, hand soaps, shampoos and other free-flowing products that foam readily, in bottles with a neck wide enough to take the nozzle.

Overflow filling
Overflow fillers seal against the container neck or sit at the fill level and return excess product, with its foam, to the supply tank. The Oklahoma State University extension fact sheet on filler selection describes them as better suited to non-carbonated, thin-to-medium viscosity liquids such as soaps and cleaners, because the recirculation path removes foam as it forms.
The other benefit is visual. With clear containers, an overflow nozzle gives a consistent fill level even when bottle volumes vary slightly, as GQ Agri’s guide to filling machine types points out. If shelf appearance matters more than exact volume dosing, such as clear bottles of liquid soap or cosmetic washes, overflow is often the sensible answer.
The trade-off is that product circulates back to the tank, so it needs to tolerate recirculation, and the return path must not itself create foam.

Counter-pressure filling
This is for carbonated or aerated drinks rather than soaps. A counter-pressure head seals on the container, purges air with gas and holds the container at a pressure equal to or slightly above the liquid pressure. The same OSU fact sheet says this significantly reduces foam. If you bottle sparkling drinks, our drinks industry page is the place to start a conversation about your product.
Piston and volumetric filling with a controlled stroke
Piston and volumetric fillers dose by volume rather than level, which keeps weight and volume consistent. For foaming products they work best when paired with a diving nozzle and a controlled, slower initial fill, then a faster main fill once the nozzle tip is submerged. Our volumetric filler AF0020 is an example of the volumetric approach.
Quick comparison
| Method | Best for | Main strength | Main trade-off |
|---|---|---|---|
| Bottom-up / diving nozzle | Foaming, free-flowing liquids | Fills below the surface, little foam | Slower cycle, careful setup per format |
| Overflow | Thin to medium, non-carbonated, clear containers | Consistent visual fill level | Product recirculates; nozzle seals on the neck |
| Counter-pressure | Carbonated or aerated liquids | Equalised pressure limits foam | Needs sealed heads and a gas supply |
| Standard gravity or top-fill | Calm, non-foaming liquids | Simple and economical | Foam and splashing with surfactants |
Stopping drips and strings
People who search for no-drip filling are usually solving a second problem that arrives with the first. Foaming products leave bubbles and strings on the nozzle tip, which then drop onto the bottle neck, the conveyor or the next container.
Things that help:
- A positive shut-off at the nozzle tip, so flow stops cleanly rather than trickling.
- A suck-back or a short dwell before the nozzle lifts clear, so the last drop is not left hanging.
- Nozzle bore matched to viscosity. Thicker products need a different tip from thin ones.
- Drip trays and, where needed, a nozzle wipe for sticky or surfactant-heavy products.
- Correct bottle alignment. A nozzle that is slightly off-centre will drip on the neck however good it is.
A clean neck matters downstream too. Residue on the thread affects capping and sealing, and it undermines label adhesion on bottles that get handled. If you are building a full line, think about the filler, capping machinery and labelling machines as one system.
Matching the method to your product
Use the product, not the machine brochure, as the starting point.
Detergents, hand wash and shampoos
High surfactant content means stable foam. Bottom-up filling is the usual first choice. If bottles are clear and fill level is what customers see, consider overflow as well. Check that your viscosity allows the product to flow through the nozzle at a reasonable speed.
Cosmetics and personal care
Shower gels, cleansers and body washes foam, and they often come in small, decorative bottles with narrow necks. Nozzle diameter becomes the limiting factor, so check the neck internal diameter against the nozzle before anything else. Appearance is part of the product, so a clean neck and an accurate fill line both count.
Pharmaceutical and nutraceutical liquids
Syrups and some oral liquids can foam, and dose accuracy is not optional. Choose a volumetric method with a diving nozzle, and design the container handling so that the nozzle does not become a route for contamination between units. Your quality system and your own validation requirements decide the rest, so involve your quality team early.
Food and drink
Sauces, dressings, plant-based drinks and juices can foam when agitated. Overflow suits thin products in clear bottles. For carbonated drinks, counter-pressure is the established route.
Our perspective: test the product, then choose the machine
Foam is a product problem as much as a machine problem. The same filler can run one shampoo perfectly and splash another, because the surfactant package, temperature and air content differ.
That is why we do not start with a model number. We start with questions. What is the viscosity? How does it foam, and how long does the foam last? What container, what neck size, what output per minute? Is the container clear? Does the product tolerate recirculation?
Our approach is built around customisation. We design machinery around your operational requirements, and the nozzle type, the number of heads, the layout and the integration with capping and labelling are all things we can adjust. The cheapest mistake in packaging is the one you catch before the machine is built, so we would rather spend an hour on your product up front than a week on the line later.
One piece of advice we repeat often: do not try to buy your way out of an upstream air problem. If your tank vortexes or a suction fitting leaks, fix that first. Then choose a filling method for the foam that remains.
— Trevor
A practical way to trial and commission a foaming product
- Define the product. Record viscosity, temperature at filling, surfactant content if known, and how quickly foam collapses in a jug.
- Define the container. Material, clear or opaque, neck internal diameter, fill volume range and headspace requirement.
- Audit the supply path. Remove vortexing, splash points and air leaks as described above.
- Choose the method. Use the table above as a shortlist, then confirm with a test run on your own product.
- Tune the cycle. With a diving nozzle, set the lowest and highest positions, the travel speed and the start flow rate. Fill slowly until the tip is covered, then speed up.
- Check the output. Weigh or measure a sample of filled containers, look at the necks for drips, and check that fill level looks right on the shelf.
- Plan for changeovers. Record the settings for each bottle format so that operators can return to them quickly.
When the line runs, training matters as much as the hardware. Settings that are written down and understood by operators keep performance stable across shifts.
Choosing a KBW liquid filler
We design and manufacture liquid filling machines for different viscosities, in automatic and semi-automatic formats, for pharmaceutical, nutraceutical, cosmetic and food and drink producers. Our liquid filling machines range includes the semi-automatic AF0010 for smaller runs and the automatic bottle filling machine AF0120 for higher output. Our guide on how to decide on the most suitable liquid filling machine walks through the wider selection questions.
If you have a product that foams, contact us through our website with your product details, container and target output. We also provide installation, training and ongoing support and maintenance.
FAQ
What is the best way to fill a foamy liquid?
For most free-flowing, high-foaming products, fill from the bottom up with a diving nozzle so the liquid never falls through air. For thin to medium non-carbonated products in clear bottles, an overflow filler is a strong alternative because it recirculates the foam. The right answer depends on your viscosity, container and output, so test your own product.
Why does my filler foam even at low speed?
The air may already be in the product before it reaches the filler. Vortexing in a hopper, a splashing return line or a leaking suction fitting can all introduce bubbles, as IDA explains. Check the liquid path from the source vessel to the filler inlet before changing machine settings.
Are diving nozzles slower than standard nozzles?
Usually, yes, because the nozzle has to lower into the container and rise during filling. MOM Packaging notes that this reduces throughput and needs careful adjustment at each format change. Many producers accept this for a clean fill, and a multi-head layout can help recover output.
How do I stop nozzles dripping after filling?
Use a nozzle with a positive shut-off, a suck-back or short dwell before the nozzle lifts, a bore suited to the viscosity and a drip tray. Make sure containers are centred under the nozzle. Foaming products often need all of these together.
Sources
- Solving Foaming Issues in Liquid Filling: 9-Step Guide, IDA
- Technical glossary of industrial liquid filling, MOM Packaging
- Filler Identification and Selection for Liquid Foods, Oklahoma State University
- 6 Mainstream Edible Oil Filling Machine Types and Their Filling Methods, GQ Agri